Labubu Crochet Pattern: Plush Amigurumi Instructions
An illustrated plush amigurumi guide covering the ears, head, arms, joined legs, body, and embroidered face. Review the two source notes before starting.
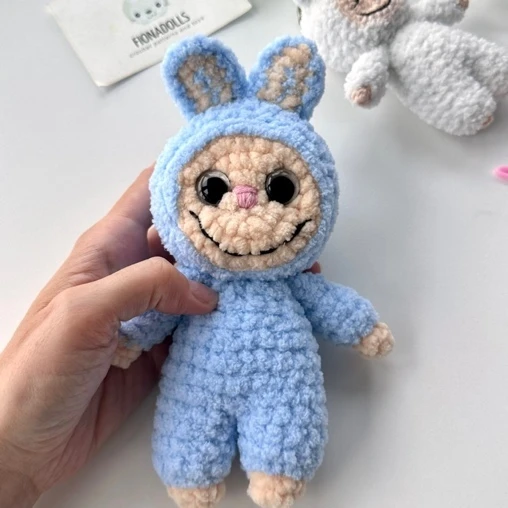
This plush amigurumi project combines a rounded face, long two-layer ears, small embroidered details, and a soft body with joined arms and legs. The instructions below use US crochet terms and keep the round numbers and stitch totals from the supplied pattern.
Finished size: approximately 8 inches / 20 cm including the ears, with the original plush yarn and a 4 mm (US G/6) hook. The source describes the skill level as easy, with basic crochet and sewing skills required. Because two instructions need clarification, read the review notes before beginning.
Read before you crochet: the source contains conflicting ear-color directions and a leg-joining line that lists 12 sc + 9 sc = 24 stitches. Twelve plus nine is 21, so that line does not establish the stated 24-stitch round. Both points are flagged at the relevant steps. No replacement count or color instruction has been invented. Resolve them before completing those steps; this is not a fully test-crocheted or corrected pattern.
Materials and tools
The source gives two alternative yarn selections. Use one suitable set rather than combining both columns.
| Purpose | US yarn option | Turkish yarn option |
|---|---|---|
| Fluffy main color, approximately 30 g | Little Bunny, 100 m / 109 yds per 100 g, shade 2079-05 | Alize Softy Plus, 120 m per 100 g, shade 181 blue |
| Peach contrast, approximately 10 g | Premier Parfait Chunky, 120 m / 131 yds, shade 1150-32 Shell | Himalaya Dolphin Baby, 120 m per 100 g; the source color swatch is labeled 80333 |
You will also need:
- Black or brown cotton yarn and pink cotton yarn for face embroidery.
- White plush yarn for the teeth.
- A 4 mm / US G/6 crochet hook.
- 14 mm glitter safety eyes.
- Fiberfill or polyester stuffing.
- A tapestry needle and scissors.
- Durable yarn, such as YarnArt Jeans, for shaping the muzzle.
- Long plastic needles for positioning the head before sewing.
Smaller version: the source suggests a 2 mm hook, Alize Softy, and YarnArt Jeans, keeping the same crochet pattern. The stated finished height is approximately 5 inches including the ears. Different yarn and tension affect the actual size.
Crochet abbreviations
All stitch names use US terminology.
| Term | Meaning |
|---|---|
| ch | Chain |
| sc | Single crochet |
| inc | Increase: 2 sc into one stitch |
| dec | Decrease |
| MR | Magic ring |
| rnd(s) | Round(s) |
| st(s) | Stitch(es) |
| sl st | Slip stitch |
| hdc | Half double crochet |
| dc | Double crochet |
| BLO | Back loops only |
| (sequence) × n | Repeat the sequence n times |
| Total | Number of stitches stated for the completed round |
Working method and color changes
Work the pieces in continuous spirals unless a step specifies otherwise. Do not add a slip stitch to end every round or a chain to begin the next round. Crochet firmly enough to keep the stuffing from showing through.
The source describes a magic-ring start as an option, or ch 2 and work the required single crochet stitches into the second chain from the hook. The component instructions below retain their written ch-2 starts.
To change colors, begin the last stitch in the current color and complete its final yarn-over and pull-through with the new color. Leave the previous color behind the work when it is needed again. When changing back, complete the final pull-through of the last stitch with the returning color.
Ears — make two layered ears
Each ear has a back piece and a front piece. Use the 4 mm / US G/6 hook.
Back pieces — make two
The source specifies pink fluffy yarn for the back pieces. Ch 5.
Row 1: work 1 sc into the second ch from the hook, 2 sc, then 3 sc into the next chain. Continue around the other side of the foundation chain with 3 sc. Total: 9 stitches.
Cut the yarn. Make the second back piece in the same way.
Front pieces — make two
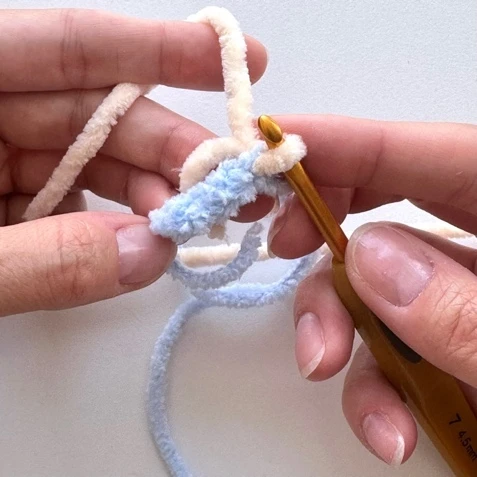
The source says to ch 5 in blue fluffy yarn, then change to peach, leaving the blue yarn attached.
It then labels Row 1 as being worked with blue yarn: 1 sc into the second ch from the hook, 2 sc, then 3 sc into the next chain; continue along the other side with 3 sc. Total: 9 stitches. It subsequently says to cut the peach yarn.
Ear-color review: the source switches to peach before Row 1, describes Row 1 as blue, and then cuts peach. The back-piece direction also names pink while the main project uses blue. These directions are preserved rather than silently corrected. Confirm the intended color sequence before making the layered ears.
Join the layers
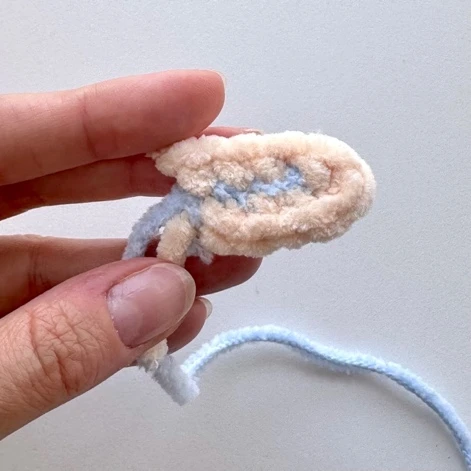
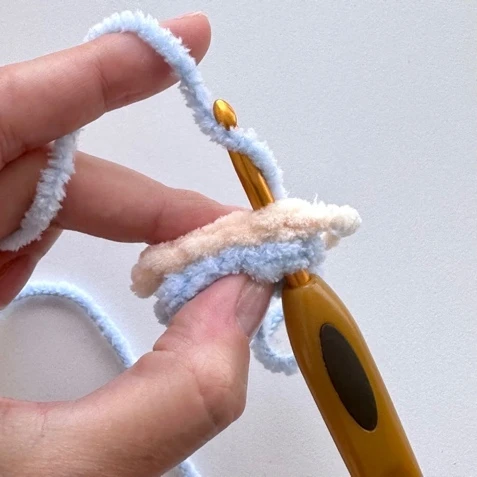
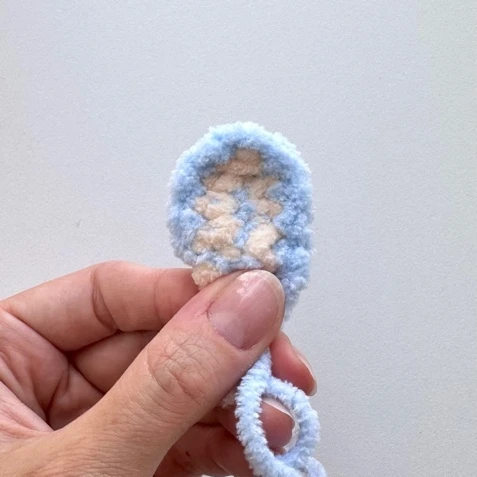
Place one back and one front piece together. With blue fluffy yarn, work 9 sc around the pieces through both layers to join them. Fasten off and cut the yarn. Repeat for the second ear.
Head
With peach plush yarn and the 4 mm / US G/6 hook, ch 2.
| Round | Instructions | Total |
|---|---|---|
| 1 | 6 sc into the second ch from the hook | 6 |
| 2 | inc × 6 | 12 |
| 3 | (inc, 1 sc) × 6 | 18 |
| 4 | (inc, 2 sc) × 6 | 24 |
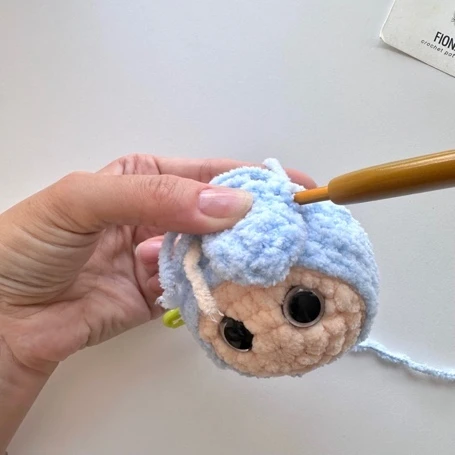
Change from peach to blue.
| Round | Instructions | Total |
|---|---|---|
| 5 | BLO: (inc, 3 sc) × 6 | 30 |
| 6–7 | 30 sc in each round | 30; 2 rounds |
| 8 | 21 sc; join the first ear with 3 sc through the ear and head; join the second ear with 3 sc through the ear and head; 3 sc | 30 |
| 9–10 | 30 sc in each round | 30; 2 rounds |
| 11 | (dec, 3 sc) × 6 | 24 |
| 12 | (dec, 2 sc) × 6 | 18 |
| 13 | (dec, 1 sc) × 6 | 12 |
| 14 | dec × 6 | 6 |
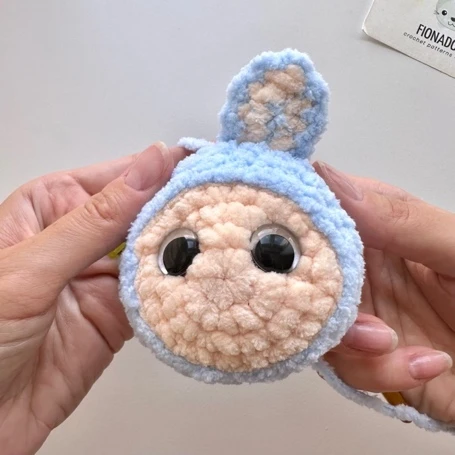
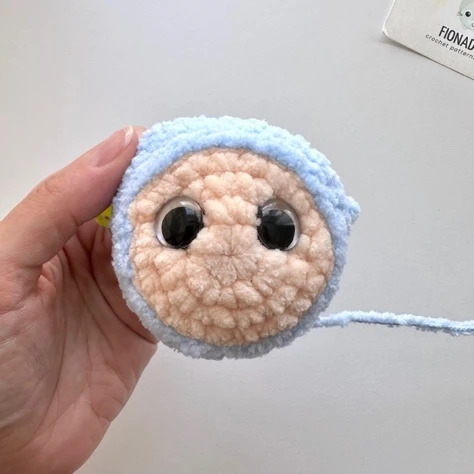
Insert the 14 mm eyes between rounds 2 and 3. The source does not specify an eye-to-eye stitch distance, so no spacing count is added here.
Stuff the head after round 12, then complete rounds 13 and 14. Fasten off and cut the yarn.
Arms — make two
With peach plush yarn and the 4 mm / US G/6 hook, ch 2.
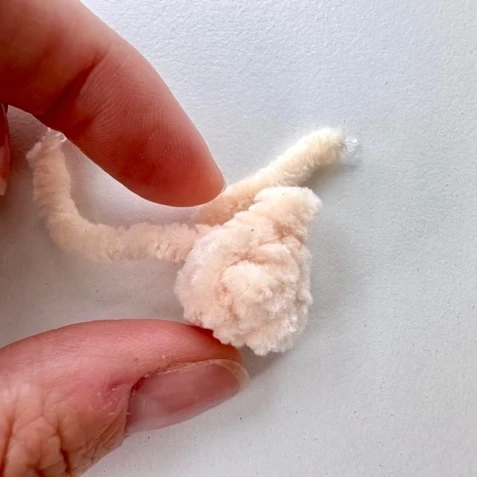
| Round | Instructions | Total |
|---|---|---|
| 1 | 6 sc into the second ch from the hook | 6 |
| 2 | 6 sc | 6 |
| 3 | (inc, 2 sc) × 2 | 8 |
Change from peach to blue.
| Round | Instructions | Total |
|---|---|---|
| 4–6 | 8 sc in each round | 8; 3 rounds |
| 7 | (dec, 2 sc) × 2 | 6 |
| 8 | Fold the arm in half and work 3 sc through both sides of round 7 | 3 joining stitches |
Stuff the piece after rounds 4–6. Fasten off and cut the yarn after closing the arm. Repeat for the second arm.
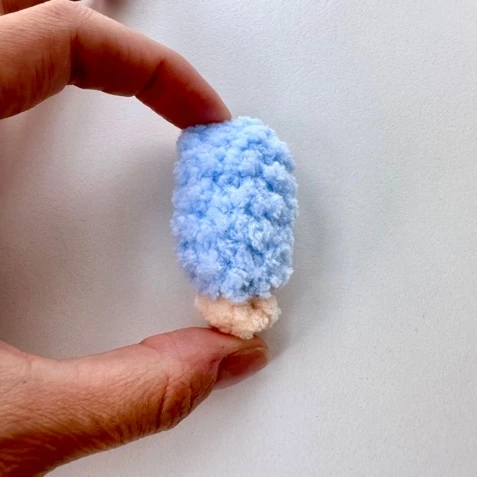
Legs — make two
With peach yarn and the 4 mm / US G/6 hook, ch 2.
| Round | Instructions | Total |
|---|---|---|
| 1 | 6 sc into the second ch from the hook | 6 |
| 2 | 6 sc | 6 |
| 3 | Change to blue; BLO: inc × 6 | 12 |
| 4–6 | 12 sc in each round | 12; 3 rounds |
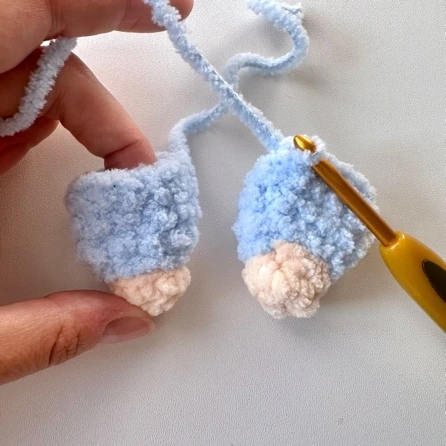
Fasten off the first leg, leaving approximately 10 cm of yarn, and cut the yarn.
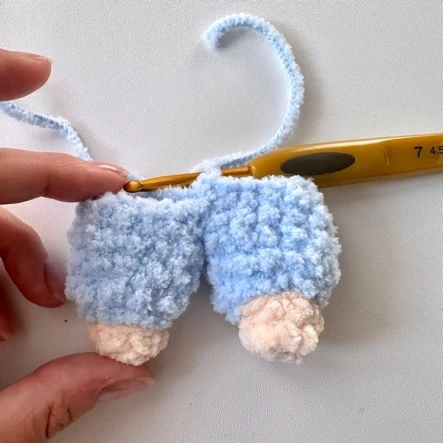
Make the second leg by repeating rounds 1–6. Do not cut the yarn after the second leg. Use that working yarn to join the first leg with a slip stitch. This joining point becomes the beginning of the round.
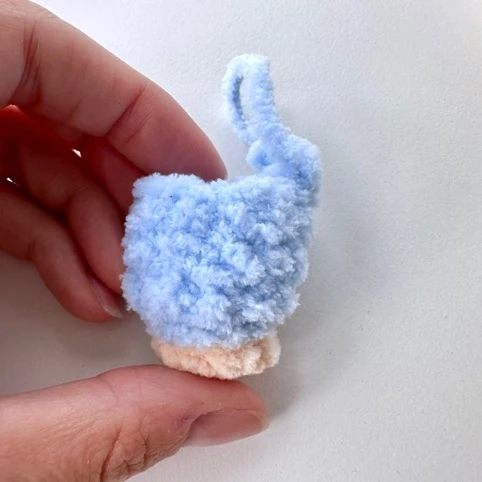
Join the legs and crochet the body
Stop and check Round 7: the written line is 12 sc in the first leg, 9 sc in the second leg, stated total 24. The listed stitches sum to 21, not 24. The remaining rounds expect 24 stitches. This article does not add three stitches or change 9 to 12 without confirmation. Resolve the joining instruction before proceeding.
| Round | Instructions as supplied | Stated total |
|---|---|---|
| 7 | 12 sc in the stitches of the first leg, 9 sc in the stitches of the second leg — unresolved count discrepancy | 24 stated; 21 listed |
| 8–10 | 24 sc in each round | 24; 3 rounds |
| 11 | (dec, 2 sc) × 6 | 18 |
| 12–13 | 18 sc in each round | 18; 2 rounds |
| 14 | (dec, 1 sc) × 6 | 12 |
| 15 | 2 sc; 3 sc through the first arm and body; 3 sc; 3 sc through the second arm and body; 1 sc | 12 |
Stuff the legs and body after round 14. After round 15, fasten off and leave a long tail for sewing.
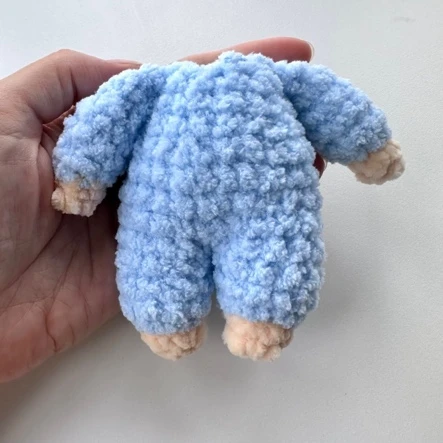
Sew the head to the body
Position the head with long plastic needles, then sew it to the body using the yarn tail left for assembly. Remove the temporary positioning needles when the head is secured.
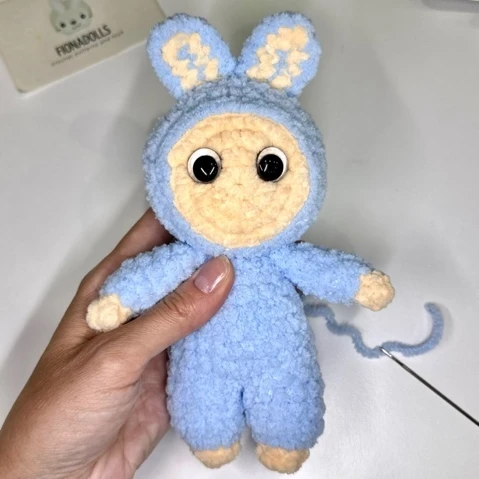
Shape the muzzle
Use YarnArt Jeans or another durable yarn, not plush yarn, for the tightening stitches. Leave a yarn tail at the start.
- Begin in the neck area and bring the needle out beside one eye.
- Take the yarn under that eye, insert the needle again, and return to the same point in the neck area.
- Move one loop to the left or right and repeat the process for the other eye.
- Pull both yarn ends so the eyes settle slightly into the head.
- Tie a knot and use a hook to hide the yarn ends inside the head.
No extra needle-entry round numbers or tightening distances are supplied in the source, so none are added here.
Embroider the nose, smile, and teeth
With pink cotton yarn, make 5–7 short vertical stitches between the eyes, between rounds 1 and 2. Add one horizontal stitch to finish the nose.
Embroider the smile with black thread, then embroider the teeth with white plush yarn.
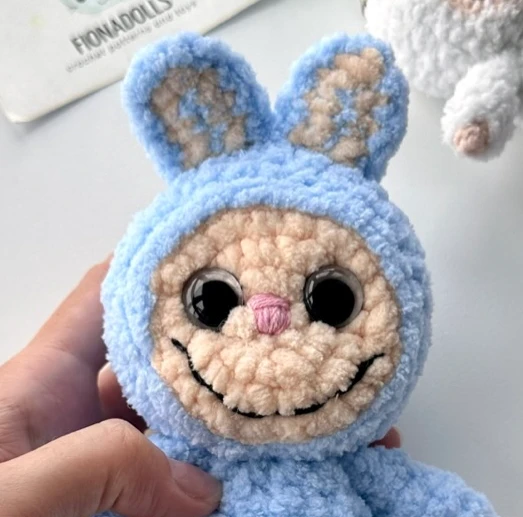 The source does not give a tooth count, exact tooth spacing, or a separate mouth chart in its written directions. No additional counts have been invented.
Finishing notes
Check that the temporary needles have been removed, the assembly seams are secure, and the yarn ends are hidden. The final dimensions will vary with the yarn and tension used.
Before relying on the pattern as a complete tutorial, clarify the ear colors and the body joining count described above.