Bunny with Hoodie Crochet Pattern: Plush Amigurumi and Accessories
Crochet a plush bunny with long floppy ears, a removable hoodie, little sleeves, a pocket, and a carrot accessory. Includes kitty and hoodie variations.
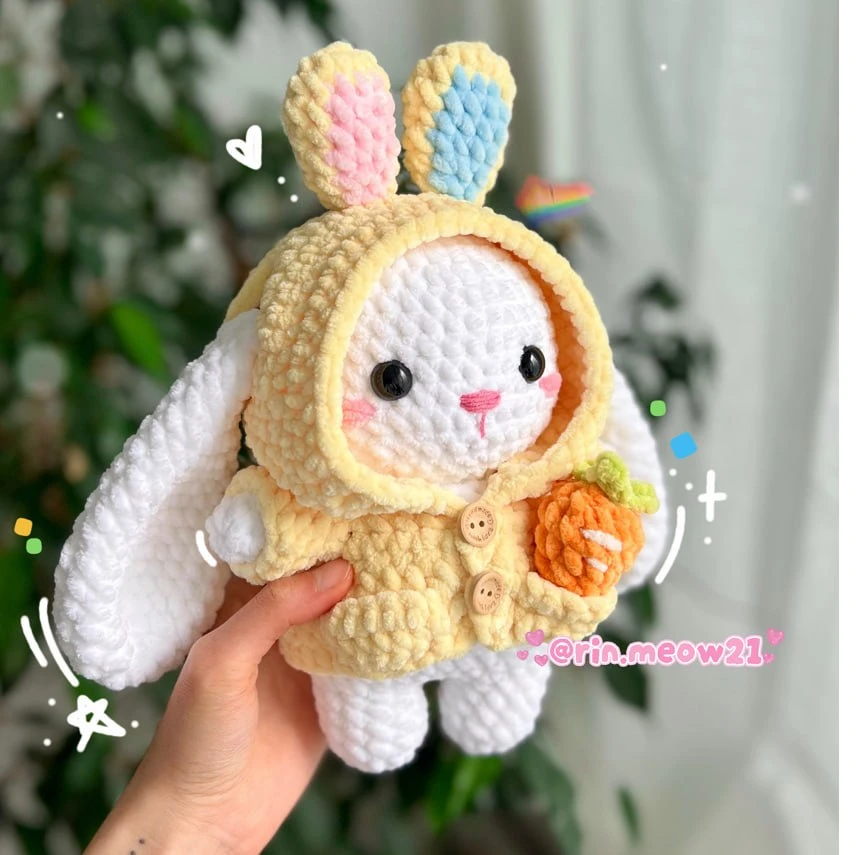
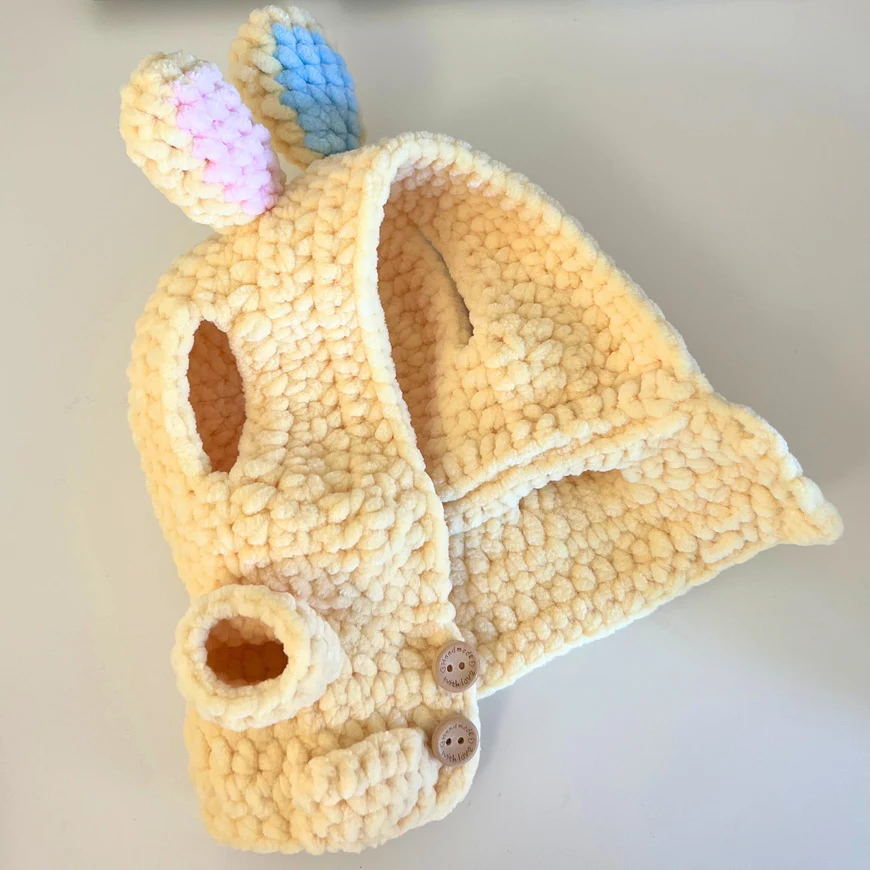
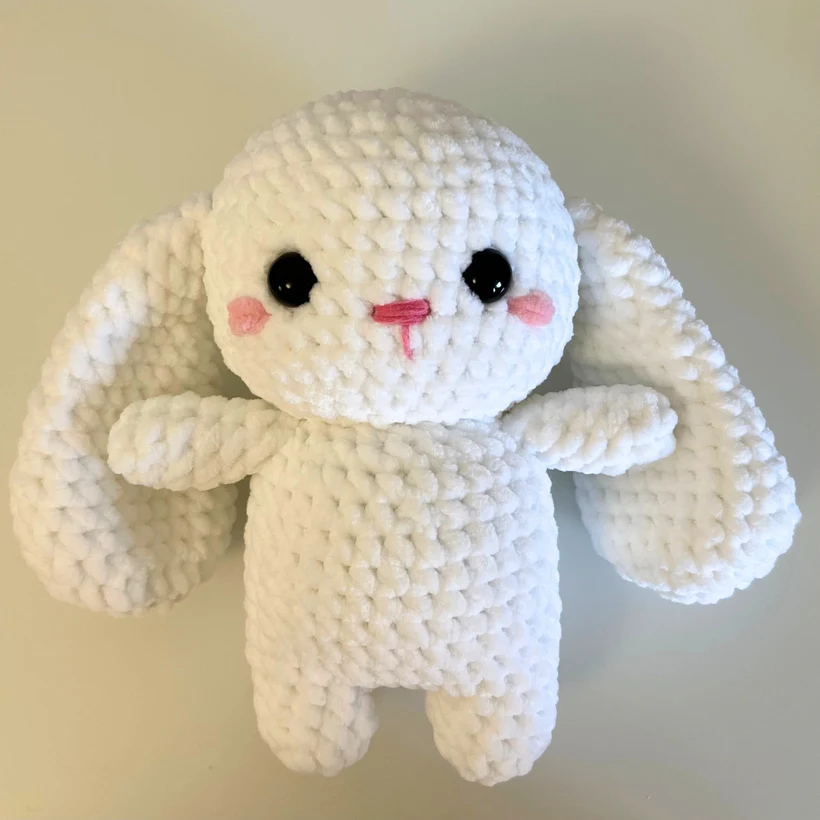
A soft bunny, a little hood, and a tiny carrot tucked at its side: this project has several small pieces that come together into a dressed amigurumi companion. The main version uses white plush yarn for the animal and yellow for the removable hoodie.
This guide includes the bunny, a kitty-ear option, the shared body, three hood opening variations, the shirt and sleeves, decorative hood ears, a pocket, and the small accessory patterns supplied with the project. US crochet terms are used throughout. The source does not state a finished height, so no exact size is promised.
Materials and crochet terms
- Himalaya Dolphin Baby plush yarn; the source estimates less than one skein per color. YarnArt and Premier Parfait are listed as alternatives.
- A 4–5 mm hook; the source uses 5 mm.
- White yarn for the bunny or kitty, yellow for the main bunny hoodie, pink for inner-ear and face details, and orange/green for the carrot. Additional optional colors are given in the relevant sections.
- 14 mm safety eyes for the main animal, or felt eyes.
- Stuffing, a stitch marker, scissors, a tapestry needle, and glue if using the source’s glued-decoration options.
- Embroidery thread for the face and cheeks; decorative buttons if desired.
| Term | Meaning |
|---|---|
| MR | Magic ring; alternatively ch 2 and work into the first chain |
| sc | Single crochet |
| inc | Increase |
| dec | Invisible decrease |
| sl st | Slip stitch |
| ch | Chain |
| hdc / dc / trc | Half double / double / treble crochet |
| BLO / FLO | Back / front loops only |
| BB | Bobble stitch |
| (sequence) × n | Repeat n times |
| (N) | Stitch count stated in the source |
Read the whole pattern before starting. Stuff and shape the head and body as you work; stuff the arms lightly and leave the long animal ears unstuffed. Turning chains are written explicitly for the clothing rows. Where the source does not give a total, none is invented.
Head — bunny or kitty
Use white yarn.
| Round | Instructions | Total |
|---|---|---|
| 1 | MR, 8 sc | 8 |
| 2 | 8 inc | 16 |
| 3 | (sc, inc) × 8 | 24 |
| 4 | (3 sc, inc) × 6 | 30 |
| 5 | 2 sc, inc, (4 sc, inc) × 5, 2 sc | 36 |
| 6 | (5 sc, inc) × 6 | 42 |
| 7–12 | 42 sc in each round | 42; 6 rounds |
| 13 | (5 sc, dec) × 6 | 36 |
| 14 | 2 sc, dec, (4 sc, dec) × 5, 2 sc | 30 |
| 15 | (3 sc, dec) × 6 | 24 |
| 16 | (2 sc, dec) × 6 | 18 |
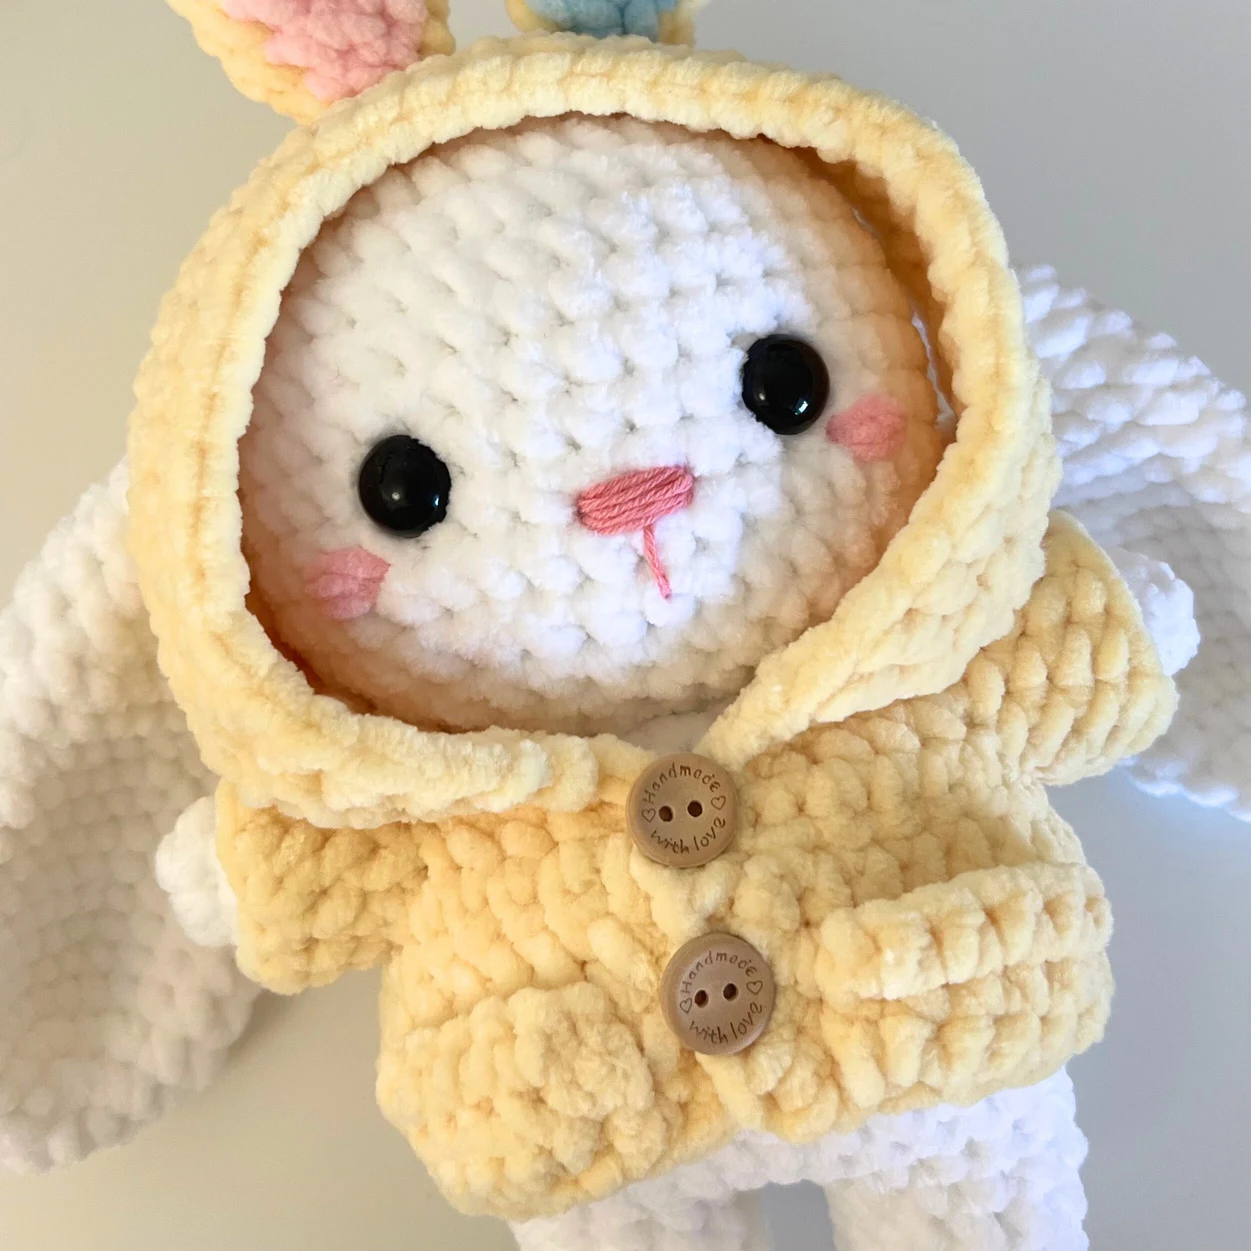
Stuff the head fully, fasten off, and cut the yarn. Position the 14 mm eyes between rounds 10 and 11, six stitches apart.
For the bunny face, embroider a pink T-shaped nose centered between the eyes at round 11. Add pink cheeks beside the eyes.
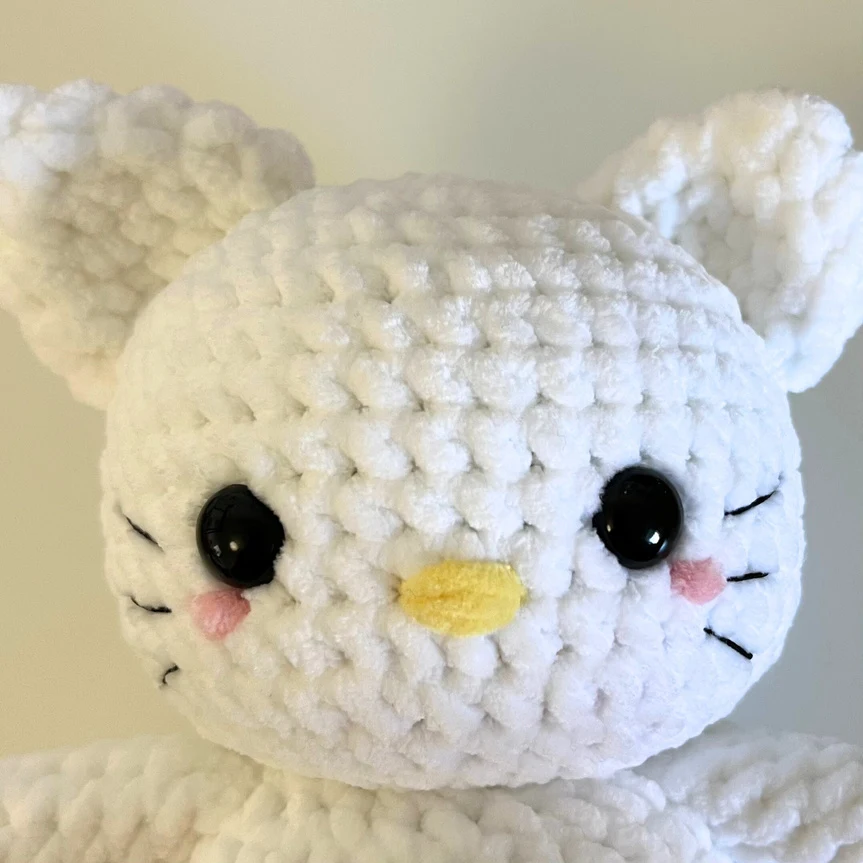
For the kitty face, use yellow yarn to embroider around two stitches at round 11 between the eyes. Add three black whisker lines across rounds 10–12, one stitch beside each eye. Add pink cheeks as desired.
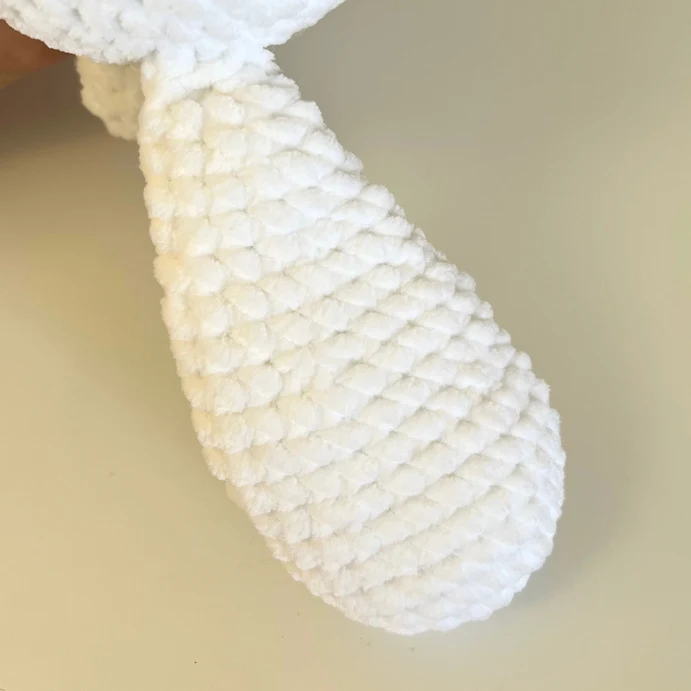
Bunny ears — make two
Use white yarn. Do not stuff these ears.
| Round | Instructions | Total |
|---|---|---|
| 1 | MR, 8 sc | 8 |
| 2 | 8 inc | 16 |
| 3 | (sc, inc) × 8 | 24 |
| 4–7 | 24 sc | 24; 4 rounds |
| 8 | (4 sc, dec) × 4 | 20 |
| 9–11 | 20 sc | 20; 3 rounds |
| 12 | (3 sc, dec) × 4 | 16 |
| 13–14 | 16 sc | 16; 2 rounds |
| 15 | (2 sc, dec) × 4 | 12 |
| 16–17 | 12 sc | 12; 2 rounds |
| 18 | (2 sc, dec) × 3 | 9 |
| 19 | 9 sc | 9 |
| 20 | (sc, dec) × 3 | 6 |
Fasten off with a long sewing tail. Sew the ears to the head at rounds 8–9, approximately five stitches from the eye.
Kitty ears — optional alternative, make two
Use white yarn: round 1, MR 4 sc (4); round 2, 4 inc (8); round 3, (sc, inc) × 4 (12); round 4, (2 sc, inc) × 4 (16); round 5, 16 sc (16). Do not stuff. Fasten off with a long tail and sew to head rounds 3–7.
Arms — make two
Use white yarn: round 1, MR 6 sc (6); round 2, (2 sc, inc) × 2 (8); rounds 3–7, 8 sc (8; five rounds). Stuff lightly. Fasten off with a long sewing tail and sew the arms at round 16 of the body.
Legs and body
Use white yarn. Make the first leg: round 1, MR 6 sc (6); round 2, 6 inc (12); rounds 3–5, 12 sc (12; three rounds). Fasten off and cut the yarn.
Repeat these five rounds for the second leg, but keep the working yarn attached. Ch 2, then join the first leg with a sc; that joining sc is the first stitch of round 6, not an additional stitch.
| Round | Instructions | Total |
|---|---|---|
| 6 | 12 sc around the first leg, 2 sc along one side of the chain bridge, 12 sc around the second leg, 2 sc along the other side | 28 |
| 7 | 3 sc, inc, (6 sc, inc) × 3, 3 sc | 32 |
| 8–13 | 32 sc | 32; 6 rounds |
| 14 | (14 sc, dec) × 2 | 30 |
| 15 | 30 sc | 30 |
| 16 | (3 sc, dec) × 6 | 24 |
| 17 | (2 sc, dec) × 6 | 18 |
Stuff the legs and body, shaping the piece as you go. Fasten off with a long tail for sewing the body to the head. Align and sew the head and body openings; the arms attach at round 16 as specified above.
Hoodie part 1 — bunny hood
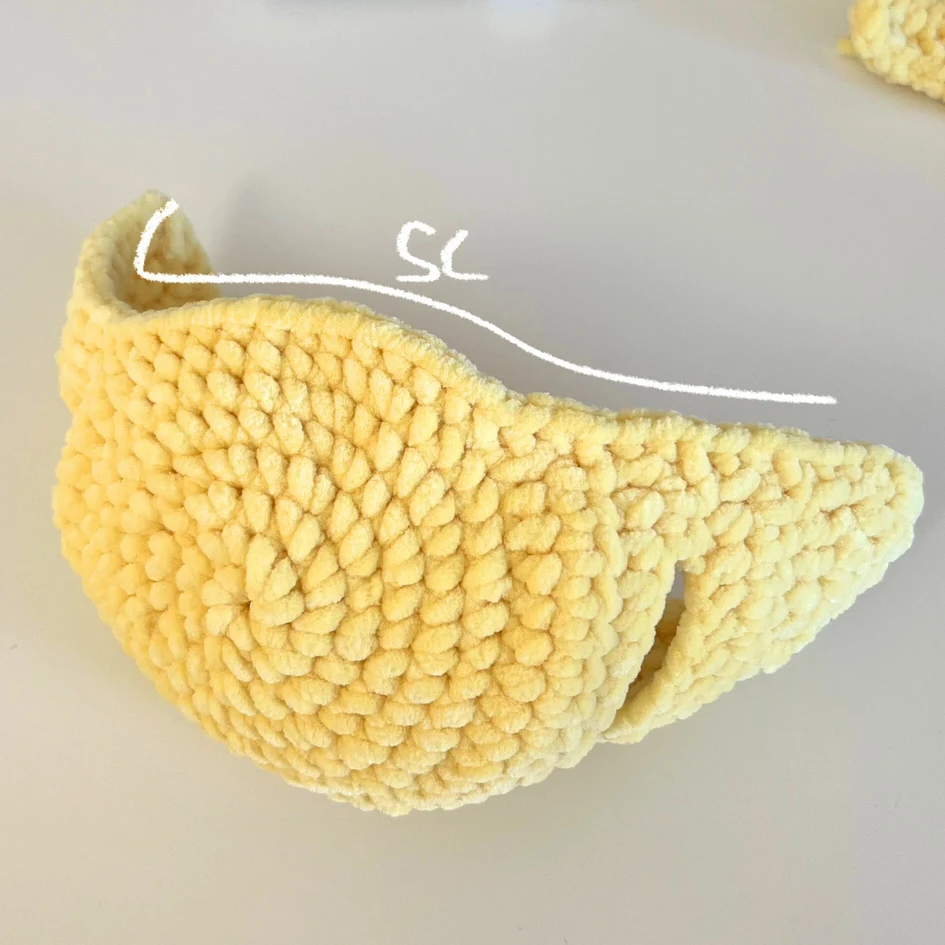
The hoodie combines a hat/hood piece with a shirt piece. Use yellow yarn for the main bunny version.
| Round / row | Instructions | Stated total |
|---|---|---|
| 1 | MR, 8 sc | 8 |
| 2 | 8 inc | 16 |
| 3 | (sc, inc) × 8 | 24 |
| 4 | (2 sc, inc) × 8 | 32 |
| 5 | (3 sc, inc) × 8 | 40 |
| 6 | 2 sc, (5 sc, inc) × 6, 2 sc | 46 |
| 7 | 6 sc, 34 hdc, ch 2, turn | Not stated |
| 8–9 | 34 hdc, ch 2, turn | Not stated |
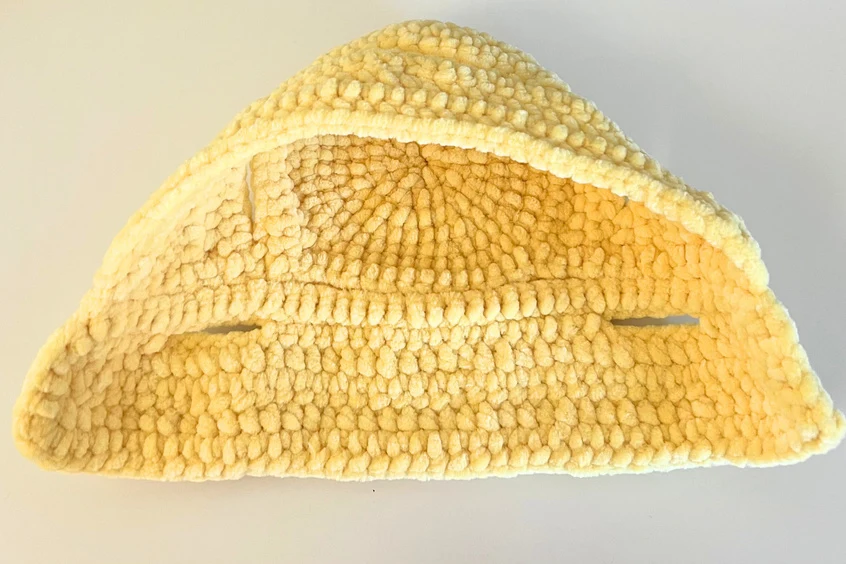
| 10 | 3 hdc, ch 7, skip 6 stitches, 16 hdc, ch 7, skip 6 stitches, 3 hdc, ch 2, turn | Not stated |
| 11 | 3 hdc, 14 sc, dec, 14 sc, 3 hdc, ch 2, turn | Not stated |
| 12 | 35 hdc, ch 2, turn | Not stated |
| 13–14 | 3 dc, 3 hdc, 23 sc, 3 hdc, 3 dc, ch 2, turn | Not stated |
| 15 | 2 dc, 2 hdc, 27 sc, 2 hdc, 2 dc | Not stated |
The work changes from rounds to turned rows at row 7. Keep the initial 6 sc and following 34 hdc exactly as written; no extra stitches are inserted into the unworked portion of the previous round.
Work sc along the lower edge, beginning at row 15 and continuing past rows 14, 13, and onward. Increase where needed to obtain 40 edge stitches. These will match the 40 stitches along the shirt piece. Leave a long tail on either the hood or shirt for the seam.
Optional hood openings — kitty and monkey styles
Kitty hood in pink
Work bunny hood rows 1–9. Replace row 10 with: 6 hdc, ch 9, skip 8 stitches, 6 hdc, ch 9, skip 8 stitches, 6 hdc, ch 2, turn.
Work rows 11–15 exactly as for the bunny hood, then make the 40-stitch joining edge in the same way.
Monkey-style hood in yellow or red
This section is a hood variation only; it does not supply a separate monkey animal pattern.
Work bunny hood rows 1–9, then:
| Row | Instructions |
|---|---|
| 10 | 2 hdc, ch 8, skip 7 stitches, 16 hdc, ch 8, skip 7 stitches, 2 hdc, ch 2, turn |
| 11 | 3 hdc, 12 sc, ch 6, skip 6 stitches, 12 sc, 3 hdc, ch 2, turn |
| 12 | 36 hdc, ch 2, turn |
| 13 | 3 dc, 3 hdc, 11 sc, dec, 11 sc, 3 hdc, 3 dc, ch 2, turn |
| 14 | 3 dc, 3 hdc, 23 sc, 3 hdc, 3 dc, ch 2, turn |
| 15 | 2 dc, 2 hdc, 27 sc, 2 hdc, 2 dc |
Finish the joining edge as for the bunny hood.
Hoodie part 2 — shirt
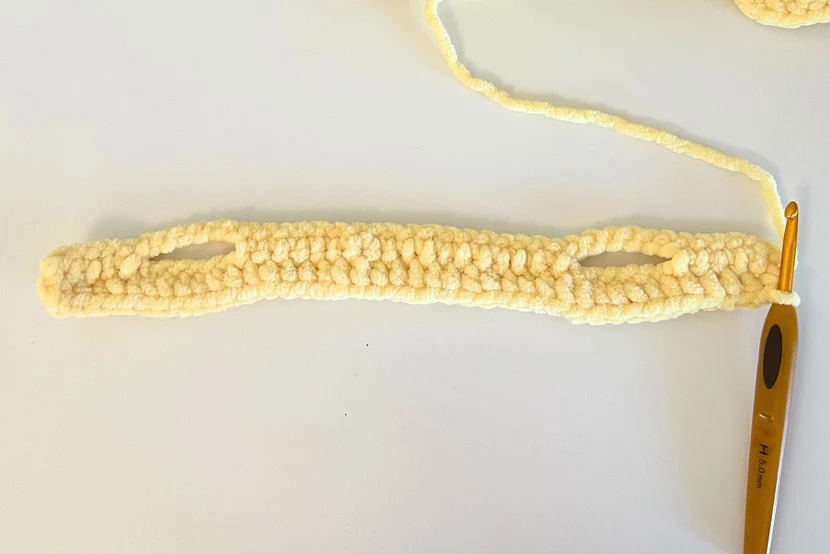
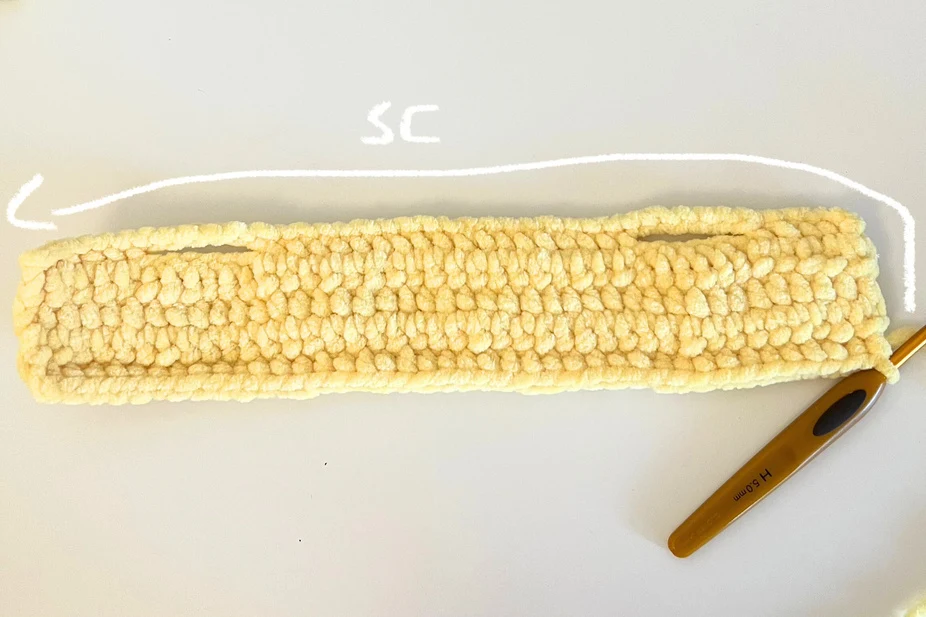
Use a color that matches the hood. Ch 41. Beginning in the second chain from the hook:
| Row | Instructions |
|---|---|
| 1 | 5 sc, ch 6, skip 6 foundation chains, 18 sc, ch 6, skip 6 foundation chains, 5 sc, ch 1, turn |
| 2–4 | 40 hdc, ch 1, turn |
| 5 | 40 hdc |
Work sc around the corners to smooth the edge. Cut and hide the yarn, or leave a long tail if this piece will provide the hood-to-shirt sewing yarn. Gently stretch the clothing pieces with your hands as described in the source.
Sleeves — one around each opening
Work into the opening made by the ch-6/skip-6 section of shirt row 1.
Round 1: 6 sc, 1 sc at the side, 6 sc, 1 sc at the other side (14). Rounds 2–4: 14 sc in each round (14; three rounds). Cut and hide the remaining yarn. Repeat on the second opening.
Sew the hood’s 40-stitch lower edge to the shirt’s matching 40-stitch edge, pairing the stitches as described in the source.
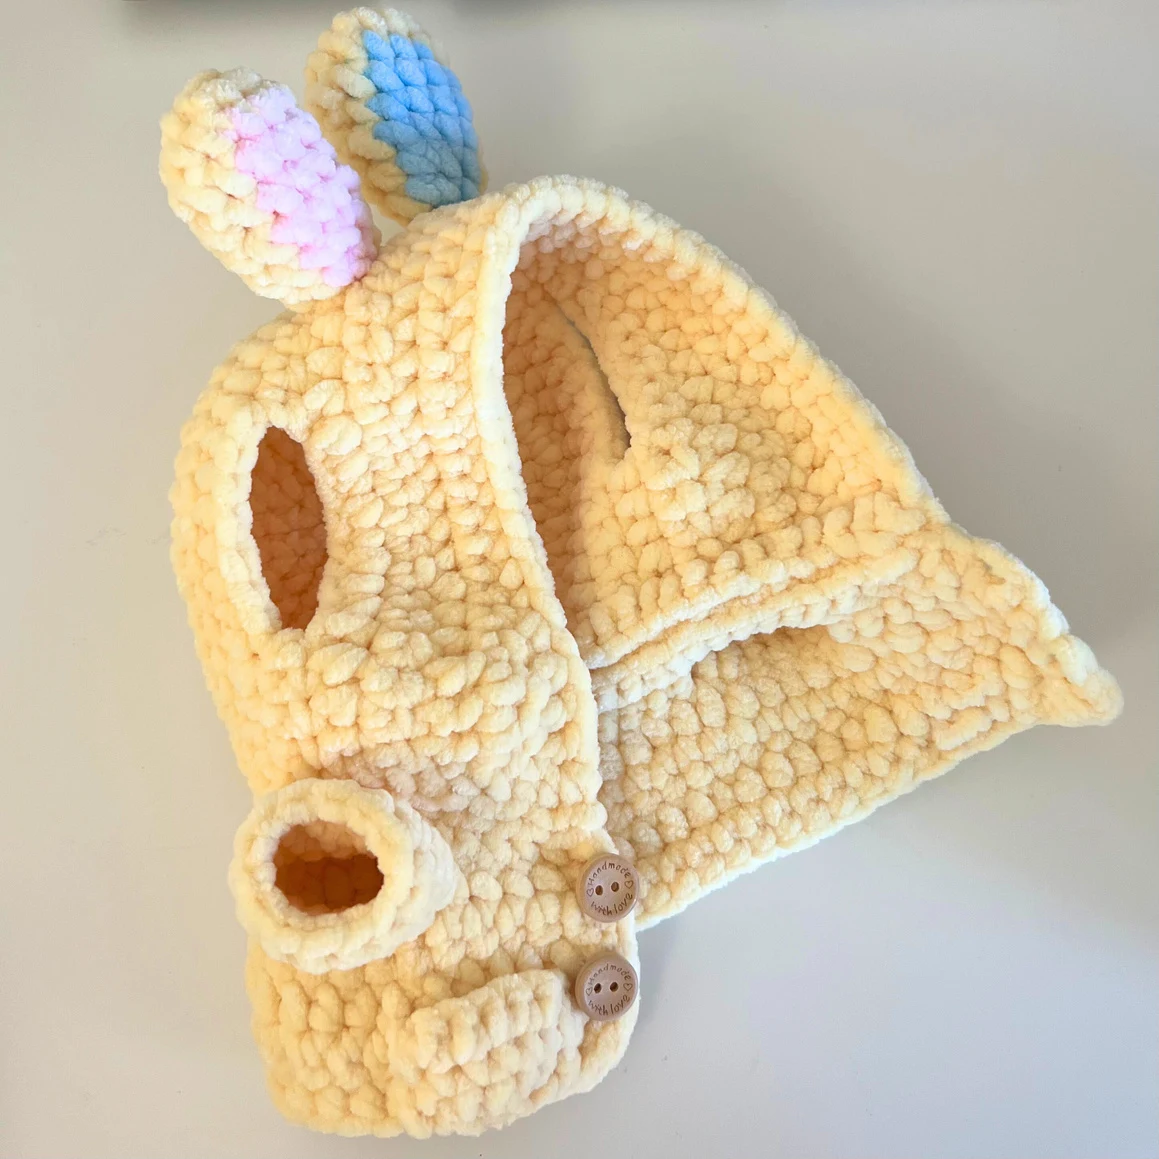
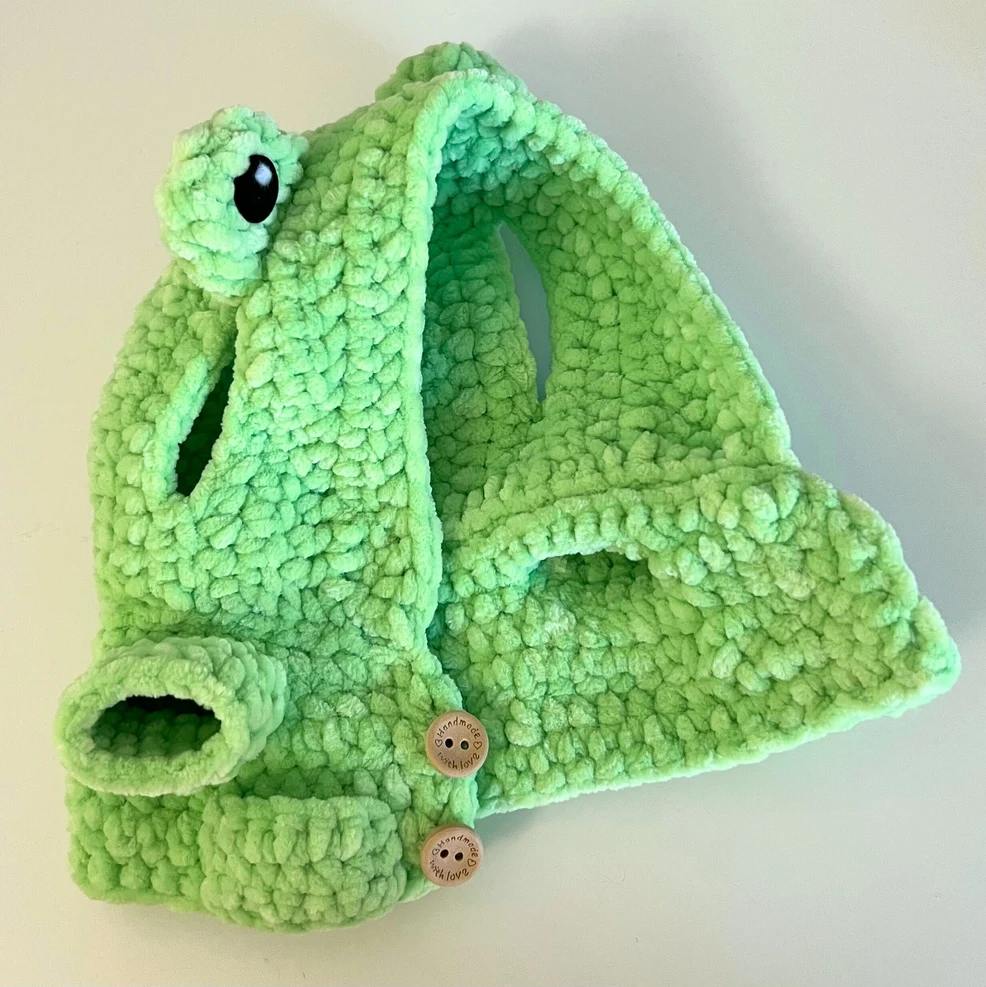
The source adds one or two buttons on one front edge and enlarges openings on the other side for fastening. It does not give an exact buttonhole stitch count, so none is invented here. Attach small decorations in a way suitable for the intended recipient.
Decorative hood ears and frog details
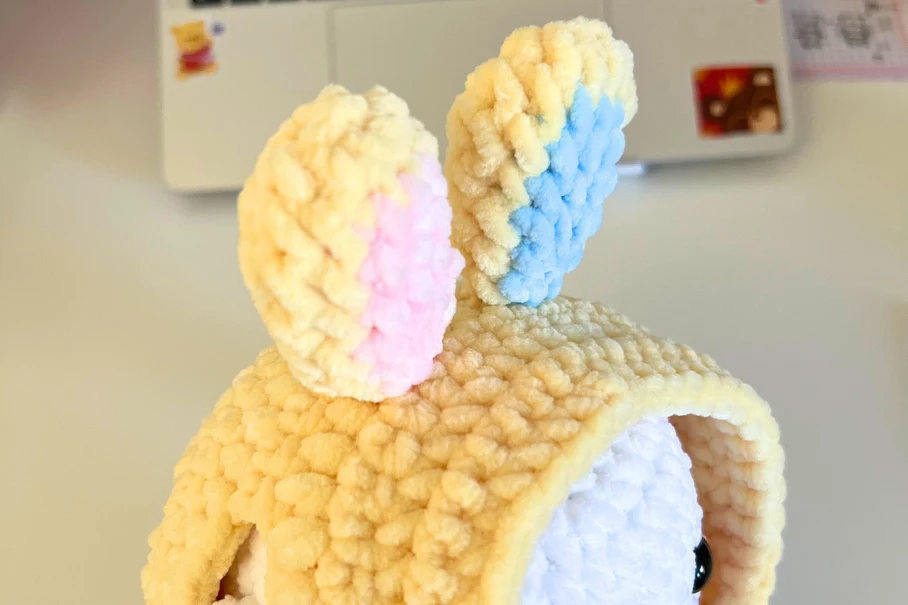
Long bunny hood ears — make two
Begin in yellow; the inner accent below uses pink.
| Round | Instructions | Total |
|---|---|---|
| 1 | MR, 7 sc | 7 |
| 2 | 7 inc | 14 |
| 3 | Yellow: sc; pink: 3 sc; yellow: 10 sc | 14 |
| 4 | Yellow: sc; pink: 4 sc; yellow: dec, 5 sc, dec | 12 |
| 5–6 | Yellow: sc; pink: 4 sc; yellow: 7 sc | 12; 2 rounds |
| 7 | Yellow: sc; pink: sc, dec, sc; yellow: sc, dec, 2 sc, dec | 9 |
| 8 | Yellow: sc; pink: dec, sc; yellow: dec, sc, dec | 6 |
Do not stuff. Leave long tails and sew the ears at hood row 11, 1–2 stitches apart. The cover photograph shows different inner-ear colors; the written sequence above retains the source’s pink accent.
Rounded pink hood ears — make two
Use pink: round 1, MR 7 sc (7); round 2, 7 inc (14); rounds 3–4, 14 sc (14); round 5, (5 sc, dec) × 2 (12); round 6, 12 sc (12); round 7, (2 sc, dec) × 3 (9). Stuff lightly, leave sewing tails, and attach at hood rows 10–11.
Frog details — make two
Use green: round 1, MR 6 sc (6); round 2, 6 inc (12); round 3, 12 sc (12). Do not stuff. Leave sewing tails and attach at hood row 11.
Hoodie pocket
Ch 7. Row 1: starting in the second ch from the hook, 6 sc, ch 1, turn. Row 2: 6 sc, ch 1, turn. Row 3: 6 sc. Leave a long tail and sew the pocket to the shirt.
Carrot accessory and leaves
Use orange for the carrot.
| Round | Instructions | Total |
|---|---|---|
| 1 | MR, 4 sc | 4 |
| 2 | 4 inc | 8 |
| 3 | 8 sc | 8 |
| 4 | (sc, inc) × 4 | 12 |
| 5 | 12 sc | 12 |
| 6 | (4 sc, dec) × 2 | 10 |
| 7 | 5 dec | 5 |
Stuff and weave in the remaining yarn. Embroider two cream lines across the carrot.
For the leaves, use green: ch 3, work 2 sl st from the second chain from the hook. Repeat this sequence two more times. Leave a long tail and sew the leaves to the top. Add an orange yarn strap, or place the carrot in the hoodie pocket.
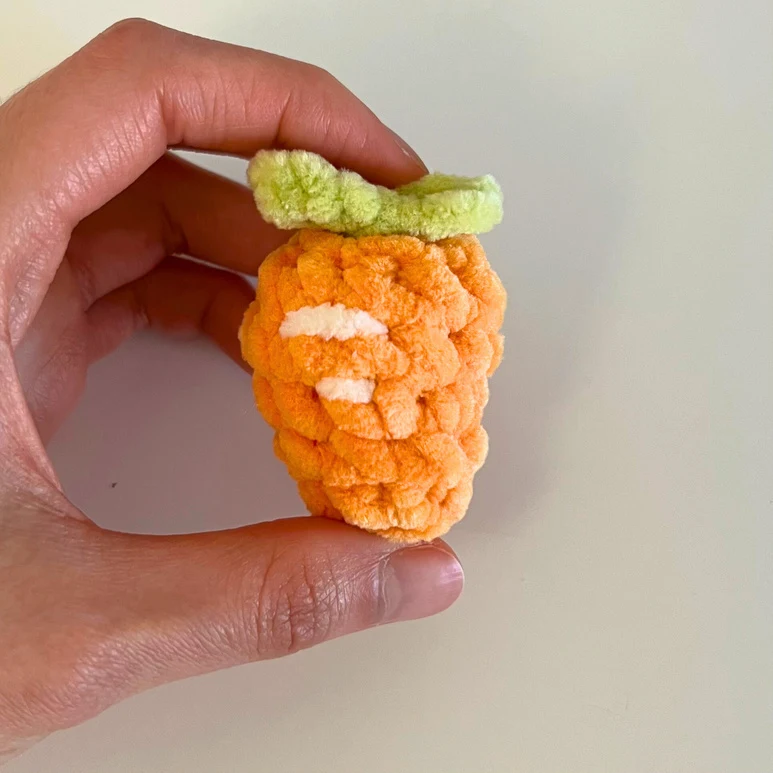
Optional chicken bag with a bunny cover
Chicken
Use yellow: round 1, MR 7 sc (7); round 2, 7 inc (14); rounds 3–6, 14 sc (14; four rounds); round 7, 7 dec (7). Stuff and hide the yarn ends.
Embroider black eyes on round 4, two stitches apart, or use 6–8 mm plastic eyes. Embroider an orange beak between the eyes.
Pink cover and ears
Cover: round 1, MR 8 sc (8); round 2, 8 inc (16); round 3, (3 sc, inc) × 4 (20); rounds 4–7, 20 sc (20; four rounds). Leave a long tail to sew it around the chicken.
Make two ears in darker pink: round 1, MR 6 sc (6); rounds 2–4, 6 sc (6; three rounds). Do not stuff. Sew them to the cover, one standing and one laid over. Attach a long pink yarn strap at the sides.
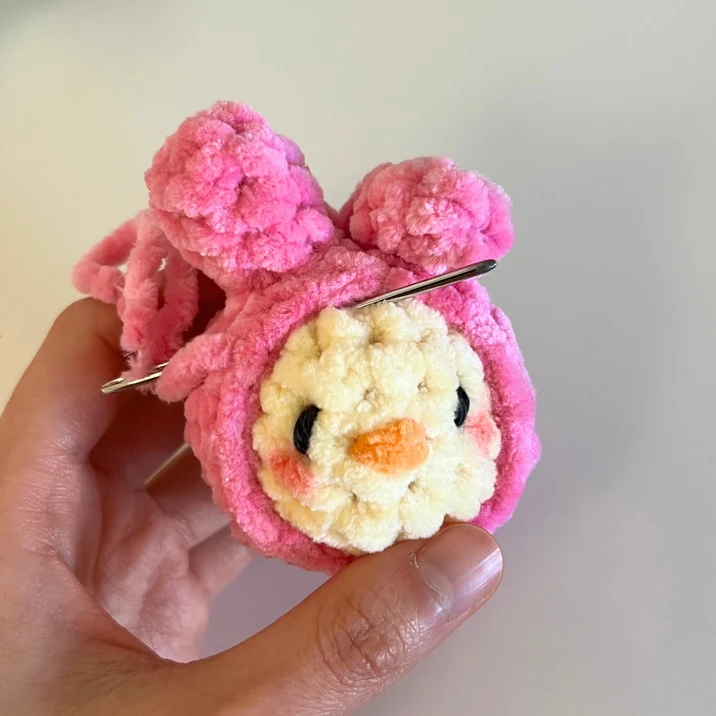
Optional chicken-in-an-egg accessory
Begin in white.
| Round | Instructions | Total |
|---|---|---|
| 1 | MR, 6 sc | 6 |
| 2 | 6 inc | 12 |
| 3 | (White sc, yellow sc, white sc, yellow inc) × 3 | 15 |
| 4 | (4 sc, inc) × 3 | 18 |
| 5 | 18 sc | 18 |
| 6 | (Yellow 2 sc, white sc) × 6 | 18 |
| 7 | 18 sc | 18 |
| 8 | 9 dec | 9 |
Stuff fully and hide the yarn ends. Position 9 mm eyes at rounds 4–5, three stitches apart. For a little wing, insert the hook at rounds 5–6 beside the eye, crochet 3 sc, then cut and hide the yarn. The source does not provide a separate embroidered beak instruction for this egg version.
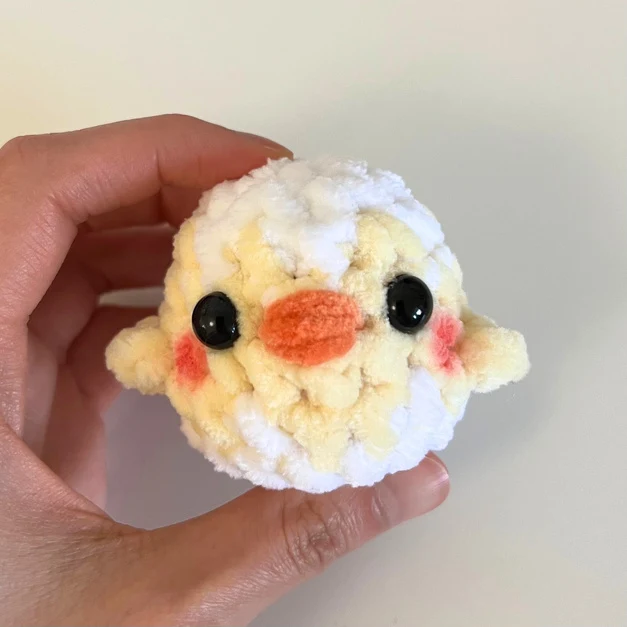
Bow and final dressing
In darker pink, ch 4. Work everything into the first chain: 2 dc, ch 3, sl st, ch 3, 2 dc, ch 3, sl st. Leave a long tail and wrap it around the middle to form the bow. Sew or attach it to the hood as appropriate.
Dress the bunny or kitty in its hoodie and guide the animal ears through the openings. Check the head seam, arms, pockets, decorations, and all loose yarn ends. Remove temporary pins or needles. The source does not specify fixed button dimensions, a finished height, or every embroidery stitch count; those details have not been invented. This article has not been independently crochet-tested.