Baby Panda Crochet Pattern: A Plush Amigurumi Tutorial
Crochet a soft baby panda with a rounded tummy, expressive eyes, and little velvet paws. Follow the complete round-by-round pattern with step photos.
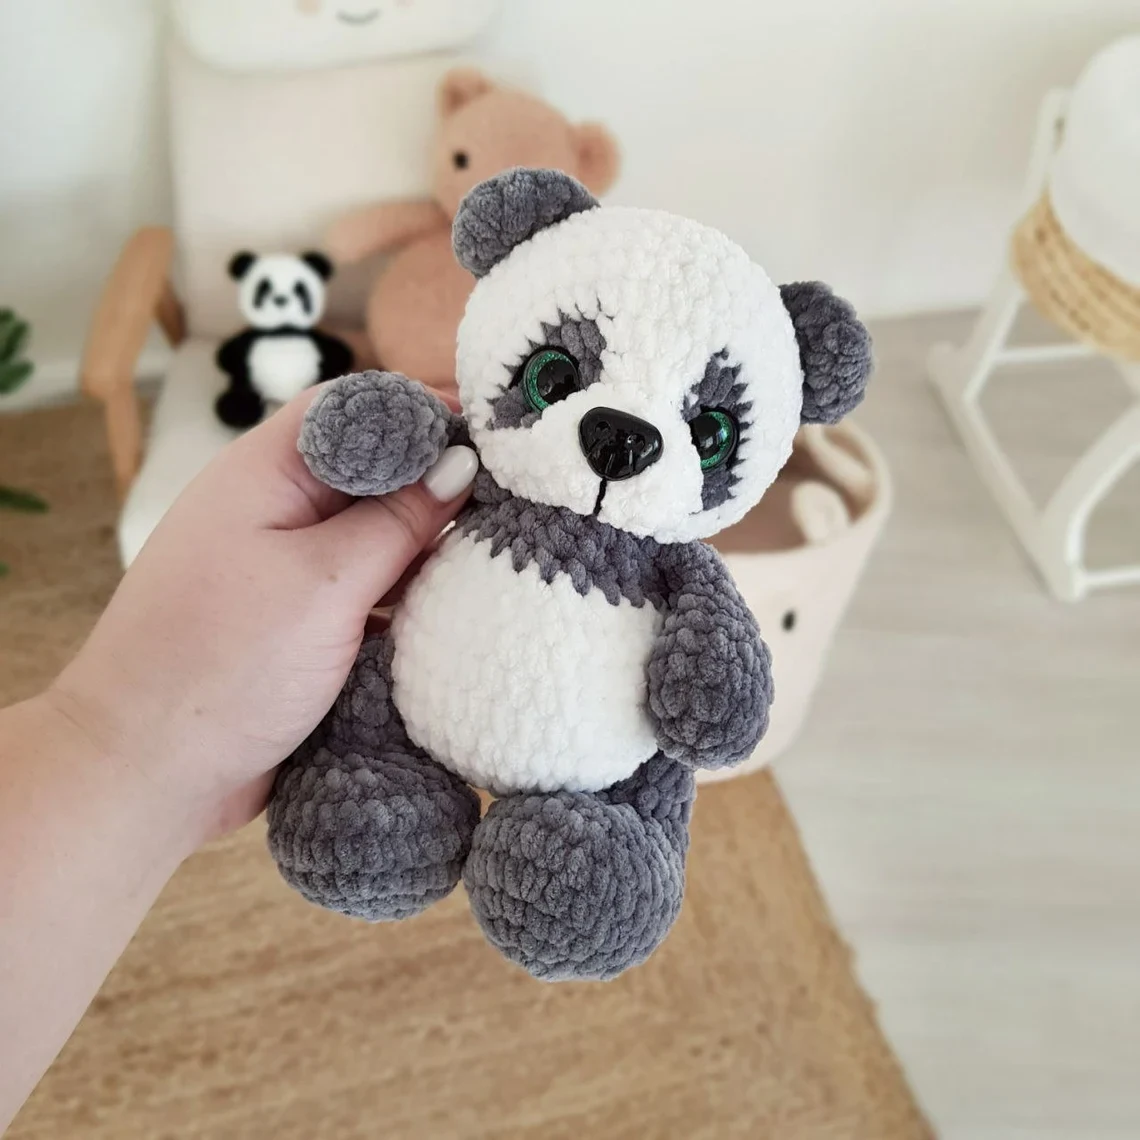
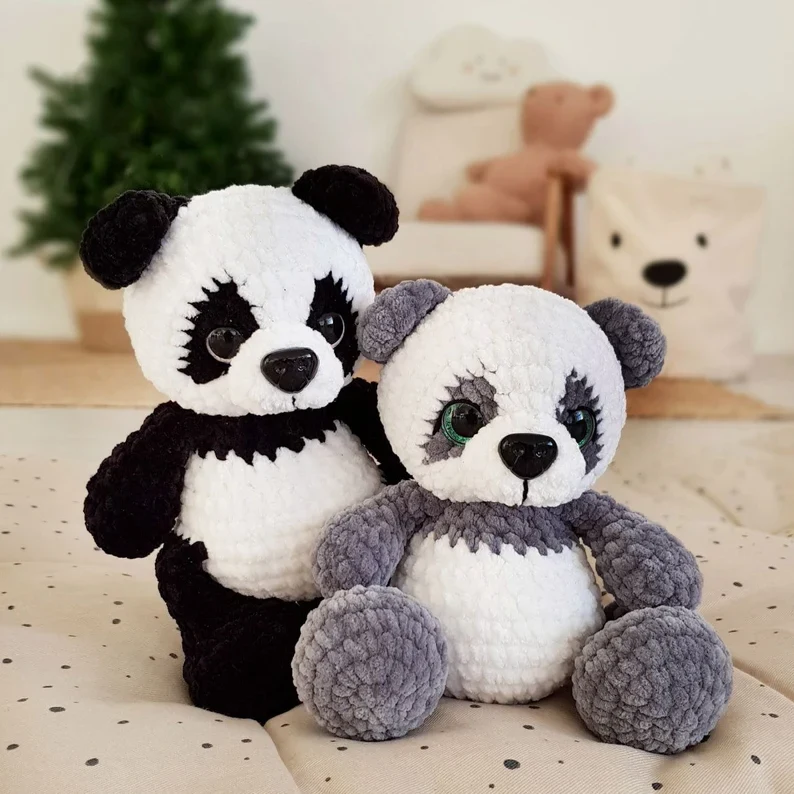
There is something especially lovely about a handmade panda: the contrast of its little eye patches, a soft white tummy, and paws that look ready for a cuddle. This plush amigurumi project brings those details together in a small, rounded companion.
Pattern design: Baby Panda by Ekaterina Chirkova (@chirka_toys), shared here with permission. Follow the original round counts below, with step photographs and assembly notes to guide your making.
At a glance: US crochet terminology · approximately 20 cm tall with the designer’s materials and tension · worked in separate pieces with joined limbs and sewn assembly. You should be comfortable counting rounds, changing colors, working an oval foundation, and sewing amigurumi pieces.
Materials and tools
Use the following materials specified in the source pattern. Equivalent yarn can change the size, firmness, and amount needed.
- Main yarn: Himalaya Dolphin Baby, super bulky/super chunky velvet yarn, 100 g / 120 m, or an equivalent.
- Dark color: 35–40 g, in gray or black.
- White: 25–30 g.
- Face embroidery: black YarnArt Jeans, fine/4-ply, 50 g / 160 m.
- Hook: 3.5 mm.
- Safety eyes: 16 mm.
- Safety nose: 18 × 15 mm or 16 × 14 mm.
- Fiberfill stuffing.
- An 8–10 cm needle and a strong needle suitable for sculpting.
- A wide-eye sewing needle, strong thread for sculpting, sewing pins, a stitch marker, and scissors.
- Two knitting needles or long needles to position the head before sewing.
The designer estimates 60–70 g of plush yarn for the whole toy. The source also lists a lighter for singeing plush yarn ends. That is a source-specific finishing suggestion, not a required crochet step; use the yarn manufacturer’s finishing guidance and keep flames away from yarn and stuffing.
For an item intended for a baby or young child, assess the suitability of detachable plastic eyes and noses before making it. The photographed version uses plastic fittings; any embroidered alternative is a modification, not an instruction supplied in this pattern.
Crochet abbreviations
| Abbreviation | Meaning |
|---|---|
| MR | Magic ring |
| ch | Chain |
| sl st | Slip stitch |
| sc | Single crochet |
| inc | Increase: work 2 sc in one stitch |
| dec | Decrease: work 2 sc together |
| (instructions) × 6 | Repeat the bracketed sequence six times |
| (N) | Total stitch count at the end of the round |
Round numbers and stitch counts below follow the source. “Dark” means your chosen contrasting color. Do not count a color change as an extra stitch.
Before you start
The designer’s finished panda measures approximately 20 cm, but your yarn, hook, tension, and stitch technique determine the final size. The source uses the “checkmark” crochet method and recommends a hook no larger than 3.5 mm, or tension firm enough to prevent gaps.
Stuffing shapes the cheeks, muzzle, and tummy. Fill the head and body firmly enough to support their shape without overpacking. Only the lower portions of the arms and legs are stuffed. Keep your beginning-of-round marker in place, and check the placement of joined limbs against the face as you work.
Crochet the ears — make two
Work in the dark color.
| Round | Instructions | Total |
|---|---|---|
| 1 | 6 sc in MR, or ch 2 and work 6 sc in the second ch from the hook | 6 |
| 2 | 6 inc | 12 |
| 3 | 12 sc | 12 |
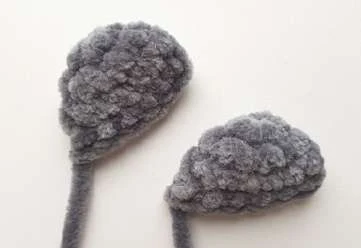
Fold the ear in half and work 6 sc through both sides. Fasten off and cut the yarn. Set both ears aside for the head.
Crochet the head — foundation and muzzle
Begin with white yarn.
| Round | Instructions | Total |
|---|---|---|
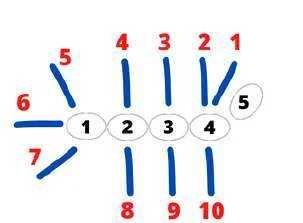
| 1 | Ch 5. Beginning in the second ch from the hook: inc, 2 sc, 3 sc in the last ch, then 3 sc along the other side of the chain | 10 |
| 2 | 2 inc, 2 sc, 3 inc, 2 sc, inc | 16 |
| 3 | 16 sc | 16 |
| 4 | 16 sl st | 16 |
Work around the foundation chain to form an oval. The original chart below shows the first round. The designer’s oval foundation video provides an additional reference.
Head rounds 5–11 — make the eye patches
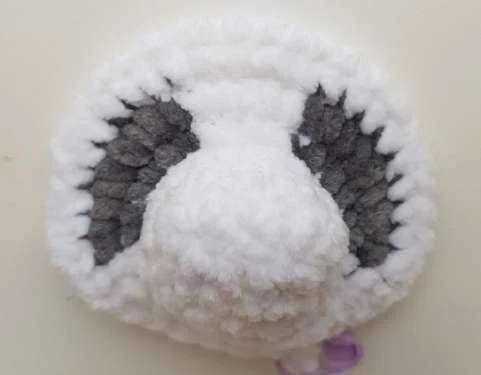
Round 5 is worked in the back loops. The dark eye patches are crocheted into the fabric rather than sewn on afterward.
Round 5: white: 1 sc, inc; dark: 3 inc; white: 2 inc; dark: 3 inc; white: inc, 5 sc. (26)
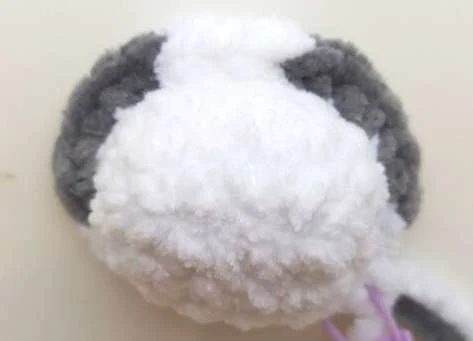
Round 6: white: 2 sc, inc; dark: (1 sc, inc) × 3; white: (1 sc, inc) × 2; dark: (1 sc, inc) × 3; white: 1 sc, inc, 5 sc. (36)
Cut and secure the dark yarn. Continue in white.
Round 7: 4 sc, inc, 22 sc, inc, 8 sc. (38)
Rounds 8–11: 38 sc in each round. (38; 4 rounds)
Join the ears and position the face
Round 12: 8 sc, 6 sc together with the first ear, 3 sc, dec, 2 sc, 6 sc together with the second ear, 9 sc, dec. (36)
Before continuing, check that the ears sit evenly in relation to the eye patches and nose. The designer allows you to adjust their position if your round has shifted. If you cannot join them evenly, leave them out of this round and sew them on after completing the head instead; keep the intended head stitch count.
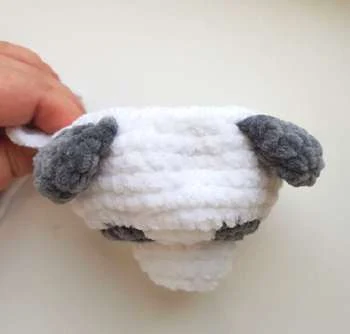
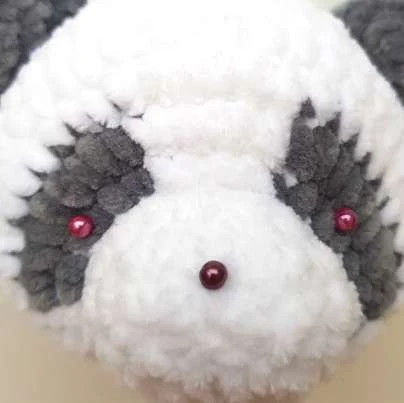
Insert the 16 mm eyes in round 5, spaced 10 sc apart, measured from the eye posts. Check symmetry before attaching the washers.
Insert the nose in the muzzle’s second round, slightly above the foundation-chain center, at the boundary between rounds 1 and 2. The original placement photograph shows the marked points.
Finish and stuff the head
| Round | Instructions | Total |
|---|---|---|
| 13 | (4 sc, dec) × 6 | 30 |
| 14 | (3 sc, dec) × 6 | 24 |
| 15 | (2 sc, dec) × 6 | 18 |
| 16 | (1 sc, dec) × 6 | 12 |
| 17 | 6 dec | 6 |
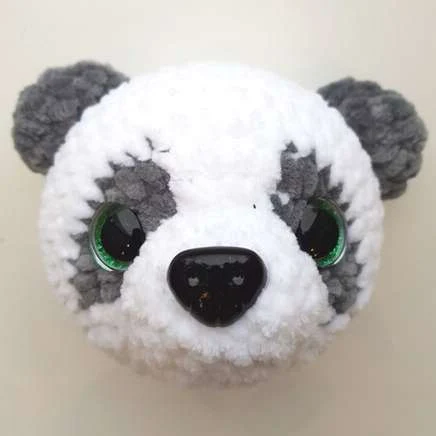
After round 15, stuff the head. Push filling into the muzzle so it stands out, and shape the cheeks by gently spreading the fabric and filling those areas. Keep the stuffing suitable for the later face-sculpting step.
Finish stuffing after round 16. After round 17, fasten off with a slip stitch, cut the yarn, and close the opening with a needle.
Crochet the arms — make two
Work in the dark color.
| Round | Instructions | Total |
|---|---|---|
| 1 | 6 sc in MR, or ch 2 and work 6 sc in the second ch from the hook | 6 |
| 2 | 6 inc | 12 |
| 3–5 | 12 sc in each round | 12; 3 rounds |
| 6 | (1 sc, dec) × 4 | 8 |
| 7–9 | 8 sc in each round | 8; 3 rounds |
Stuff only the lower part of each arm. Fold the opening flat and work 4 sc through both sides. Fasten off and cut the yarn.
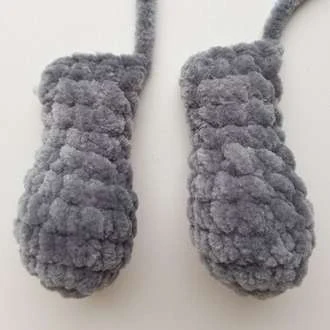
Crochet the legs — make two
Work in the dark color.
| Round | Instructions | Total |
|---|---|---|
| 1 | 6 sc in MR, or ch 2 and work 6 sc in the second ch from the hook | 6 |
| 2 | 6 inc | 12 |
| 3 | (1 sc, inc) × 6 | 18 |
| 4 | (inc, 2 sc) × 6 | 24 |
| 5–6 | 24 sc in each round | 24; 2 rounds |
| 7 | 6 sc, 6 dec, 6 sc | 18 |
| 8 | 3 sc, 6 dec, 3 sc | 12 |
| 9–11 | 12 sc in each round | 12; 3 rounds |
| 12 | (4 sc, dec) × 2 | 10 |
Stuff only the lower part of the leg. Work 1–2 additional sc, as specified in the source, then fold the opening flat and close it with 5 sc through both sides. Fasten off and cut the yarn.
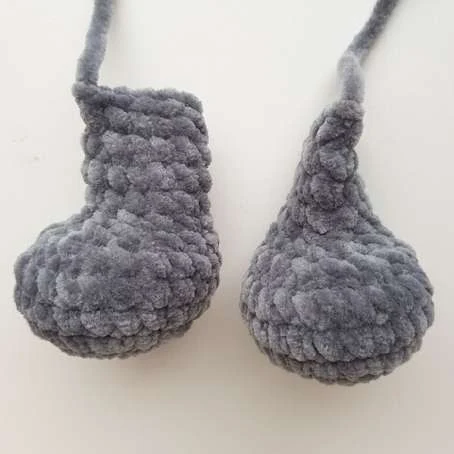
Crochet the body and join the legs
Start with white yarn. The beginning-of-round marker should run along the back when you join the legs.
| Round | Instructions | Total |
|---|---|---|
| 1 | 6 sc in MR, or ch 2 and work 6 sc in the second ch from the hook | 6 |
| 2 | 6 inc | 12 |
| 3 | (1 sc, inc) × 6 | 18 |
| 4 | (inc, 2 sc) × 6 | 24 |
| 5 | (3 sc, inc) × 6 | 30 |
| 6 | 1 sc, inc, (4 sc, inc) × 5, 3 sc | 36 |
| 7 | 6 sc, 5 sc together with the first leg, 14 sc, 5 sc together with the second leg, 6 sc | 36 |
| 8 | 36 sc | 36 |
| 9 | (4 sc, dec) × 6 | 30 |
| 10 | 30 sc | 30 |
| 11 | 10 sc, 6 dec, 8 sc | 24 |
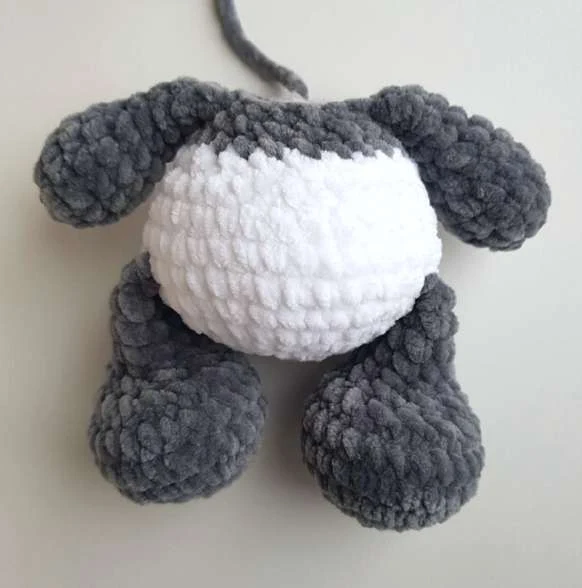
Check that the six decreases in round 11 line up evenly with the legs to create the rounded tummy. The designer notes that tension, yarn weight, and stitch slant can shift the placement. Adjust the positioning if needed while retaining the specified stitch count.
Cut and secure the white yarn. Continue in the dark color.
Round 12: 24 sc. (24)
Round 13: (2 sc, dec) × 6. (18)
Round 14: 4 sc, 4 sc together with the first arm, 5 sc, 4 sc together with the second arm, 1 sc. (18)
Check the arms against the legs and reposition them if necessary. Work 1 sl st, cut the yarn with a long tail for sewing, and stuff the body.
Crochet the tail
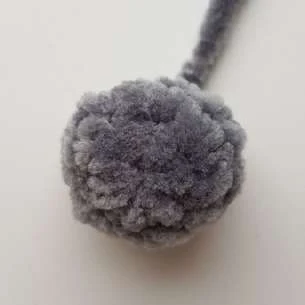
Work in the dark color.
| Round | Instructions | Total |
|---|---|---|
| 1 | 6 sc in MR, or ch 2 and work 6 sc in the second ch from the hook | 6 |
| 2 | 6 inc | 12 |
| 3 | 12 sc | 12 |
| 4 | 6 dec | 6 |
Work 1 sl st, cut the yarn leaving a long sewing tail, and stuff the little tail.
Shape the face with needle sculpting
Use a suitable long needle and nylon or another strong thread. The sculpting draws the face inward around the eyes and defines the cheeks. Follow the labeled original photographs alongside the designer’s needle-sculpting video.
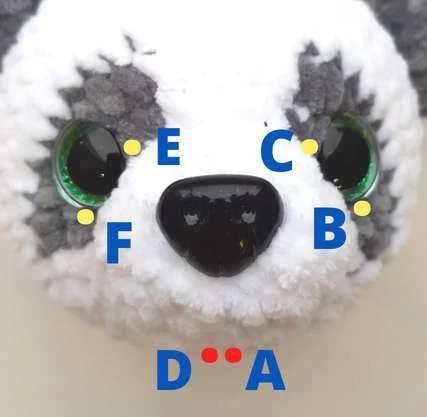
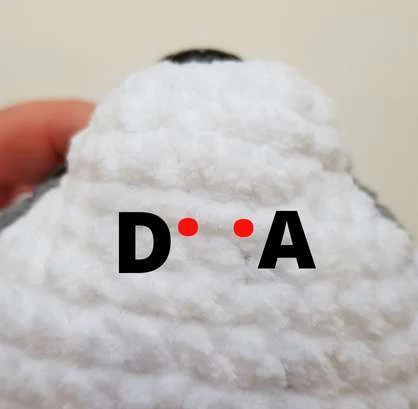
- Insert the needle at A in round 4 and bring it out at B, next to the eye.
- Insert at C, also beside that eye, and bring it out at D.
- Insert at A again and come out at E, next to the other eye.
- Insert at F, beside the second eye, and return to A.
- Pull both thread ends while gently pressing the eyes and muzzle into shape. When the expression looks right, tie a couple of knots and hide them inside the head.
Source detail to review: the PDF describes point D as “at a distance of 1 sc from point B,” but the labeled photograph places D beside A under the muzzle, away from B. This article preserves the A → B, C → D, A → E, F → A path and does not invent a corrected distance. Check the designer’s diagram and video or ask the designer before tightening the face.
Embroider the eyelids and mouth
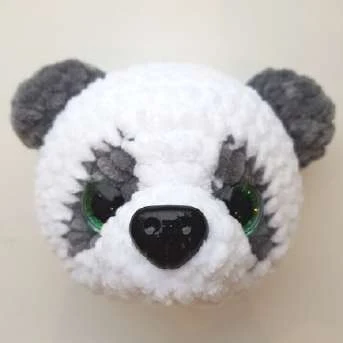
Use black YarnArt Jeans 4-ply yarn and a suitable needle to embroider the eyelids and mouth. Refer to the finished face and the designer’s face-decoration video for placement.
Attach the head and tail
Position the head evenly using two knitting needles or long needles as temporary supports. The neckline should sit close to the place where the muzzle was sculpted. Sew the head to the body with the body yarn tail or another strong thread, and reinforce the neck area with fiberfill.
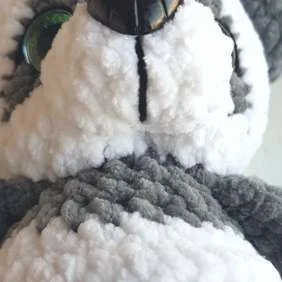
Sew the tail at the level of body rounds 5–6, using the yarn end left on the tail.
Final checks and a little celebration
Before calling your panda finished, remove every temporary pin and positioning needle, check the head and tail seams, secure loose yarn ends, and check the fittings. Gently shape the tummy, paws, and cheeks with your hands.
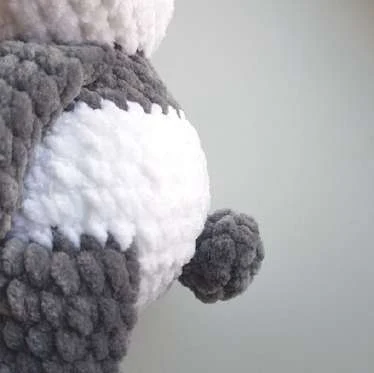
Your baby panda is ready for its photograph. Keep the designer credit with images of the finished toy: pattern by @chirka_toys. Changing the dark yarn from gray to black gives the contrasting look shown in the supplied photograph without changing the written round counts.
Pattern source: Baby Panda, Ekaterina Chirkova, @chirka_toys. The round totals were checked arithmetically against the supplied PDF; this editorial conversion has not been independently crochet-tested. The face-sculpting distance noted above remains a source ambiguity.